Rasperry Pico 2 Exploration

Raspberry released a new Pico last August: the Pico 2. Faster, with RiscV capabilities and the debug pins are at a better place on the board. But there is no wifi version yet, which makes it a bit useless for ESPHome at the moment. As the original Pico before it is pretty cheap, so I bought one to experiment with it.

The MicroPython part for the ARM core should work as before for the Pico. So I was more interested in MicroPython for the RiscV part of the board. I downloaded the Firmware for RiscV MicroPython for the Pico2 (at the bottom of the page). After copying the UF2 file on the Pico 2, it immediately reboots - as expected.

To connect on the shell I use rshell as in previous posts. In the repl I get this:

MicroPython v1.24.0 on 2024-10-25; Raspberry Pi Pico2 with RP2350-RISCV
Type "help()" for more information.
>>>

Which is quite cool. The same code I used to blink the LED a post for the Pico in February works without modification:

from machine import Pin, Timer
led = Pin(25, Pin.OUT)
timer = Timer()
timer.init(freq=1, mode=Timer.PERIODIC, callback=lambda timer: led.toggle())

The onboard LED is blinking.

Now to the internal temperature sensor. I described the usage in another previous post for the Pico. The code is:

import machine
adc_voltage = machine.ADC(4).read_u16() * (3.3 / (65536))
temp = 27 - (adc_voltage - 0.706) / 0.001721
print(f"Temperature: {temp:2.1f} °C")

And for me it displays Temperature: 24.7 °C, which is a bit more than room temperature.

The code for the BME280 worked the same as described in the same blog post. I copied the bme280_float.py from https://github.com/robert-hh/BME280 to the Pico 2 with cp bme280_float.py /pyboard and used it the same way as with the original Pico:

import machine
import bme280_float as bme280
i2c = machine.I2C(0, sda=machine.Pin(20), scl=machine.Pin(21))
bme = bme280.BME280(i2c=i2c)
print(bme.read_compensated_data()[0])

The temperature shown is a bit more realistic with 22.7 °C.

As mentioned in the pull-request that added support for the Pico 2 to Micropython: both CPUs are fully supported.

I have nothing more I could try with the Pico 2 that would not work on the original Pico too. So I stop here and wait for the wifi version.
Show the current image in Homeassistant

I have a Raspberry Pi Zero with camera that takes a photo every hour of a Minol heat usage meter. To monitor if the photo was taken, I want to take an occasional look at the current image. So I want to see the image in the Homeassistant dashboard. Of course we don't want to send the image because of size, a url to the image would be nice.

There are multiple options. For me it is not totally clear how often they reload the image. And because my image is only updated once an hour the difference is possibly high, but not very often.

But before we can add the image to the Homeassistant dashboard we need a webserver to give us the current image.

The obvious solution to get a webserver for me is using Python with python3 -m http.server and then surf to http://IP-ADDRESS:8000/. This works of course, but needs some glue (i.e. systemd) to be run in the background and after a reboot. So the more standard way is to use nginx here.

Install nginx on Raspberry Pi:

sudo apt install -y nginx

Then add to default server section in /etc/nginx/sites-available/default:

location /images/ {
    autoindex on;
    alias /home/pi/images/;
}

This adds /images/ to the webserver. After reloading nginx with sudo systemctl reload nginx the contents of the images folder is surfable. For me at this url: http://192.168.0.78/images/.

Next we need a symlink to the current image. I don't want to interfere with the scripts that shoots the photo, so we do this purely with shell commands on the filesystem:

(
  cd /home/pi/images;
  ln -sf $(find 20* -type f -printf "%T@ %p\n" | sort -n | cut -d' ' -f 2- | tail -n 1) current.jpg
)

An example of an image name is 2024/10/1730046301.jpg -- so to be sure not to symlink current.jpg to current.jpg I search only for 20*. The printf here prints first the creation time and then the filename. After the sort (using the creation time), the time is removed with cut and the last line is used. Now we have a current.jpg symlinking to the current minol image.

Next we add the image to the Homeassistant dashbaord.

First option is to add an image url via /config/helpers and Create Helper. This feels a bit intransparent. I don't know how long this image is cached. On the other hand when I looked after a few hours at the card the image was up to date. So maybe this is enough here.

The second option shows the reloading live. Using the generic Camera integration with the link to the image as still image. The only other thing needed here is to disable SSL verification. The still image will update regularly (a bit too often for my 1h new photo but I actually don't care enough). Obviously the updates are often because it is meant to be an actual live camera.

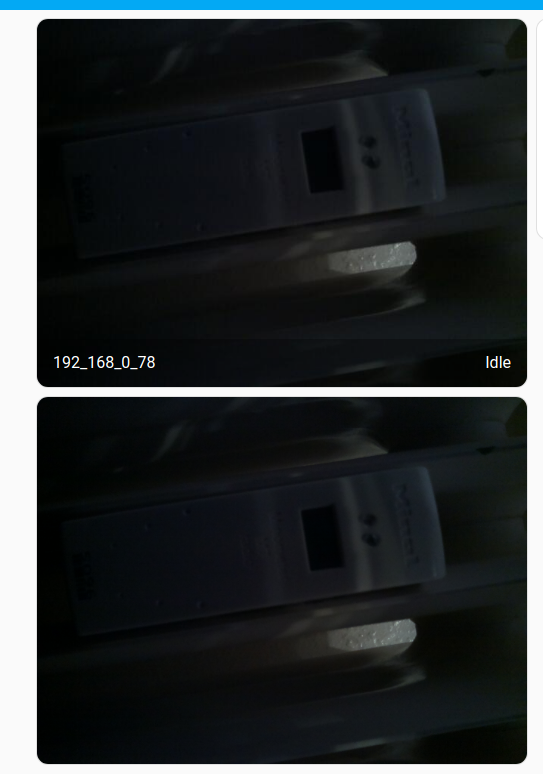
The two options look like this for me:

/images/ha_minolcam.png

As you see it is dark at the moment of the screenshot and I have no additional light for my minol cam. The top card is the Generic Camera and the bottom card is the picture card. But this is exactly what I want to have. I will keep the generic Camera option, because it shows the reload with a live progress loading circle.

Running the bepasty pastebin on Fly.io

For many years I was running a bepasty-server on a small Hetzner VPS. There is nothing wrong doing this, but updating the server and upgrading the virtualenv every year for a new Python version, feels like a chore that could be avoided. So I moved the bepasty-server to Fly.io.

The ingredients for this are a bepasty.conf, a fly.toml, a Procfile and a requirements.txt. I will go into detail on them in this post.

First the bepasty.conf. When using this you should clearly change the domain, the secret and probably the passwords in there:

STORAGE_FILESYSTEM_DIRECTORY = '/data'
SITENAME = 'your-domain.example.com'   # i.e. your fly.dev domain
SECRET_KEY = 'somelongrandomstringforthecookies'
SESSION_COOKIE_SECURE = True
DEFAULT_PERMISSIONS = 'read'
PERMISSIONS = {
    'passwordforupload': 'create,read,delete',
    'passwordforadmin': 'admin,list,create,read,delete',
}

I first used the fly.io app domain to setup up everything and replaced it later with my own domain. Bepasty uses passwords to increase the allowance higher than the default (read-only).

Next the fly.toml.

app = 'mfa-paste'
primary_region = 'ams'

[build]
  builtin = "python"

[build.settings]
  pythonbase = "3-slim"

[[mounts]]
  source = "bepasty_data"
  destination = "/data"
  processes = ["app"]

[http_service]
  internal_port = 8000
  force_https = true
  auto_stop_machines = true
  auto_start_machines = true
  min_machines_running = 0
  processes = ['app']

[[vm]]
  size = 'shared-cpu-1x'
  memory = '256mb'

Of course your app should be named differently. I used the Python builder, that is starting a Procfile as default. The default Python here is a bit old, so I set it to always use the newest stable Python 3.x with the current slim Debian (this is the name of a Python Docker hub tag).

The volume needs to be created before a deployment will work with for example: flyctl volumes create bepasty_data --size 1. The last years showed me that 1GB is enough for me.

The app is configured to auto-stop when not used. A stopped app is started on request fast enough to not be an issue here. And this saves not only costs, but no cpu/memory is blocked for no usage.

I set the memory to 256MB for the fly instance. This is a lot less than the Hetzner VPS had, but seems to be enough. To test this I uploaded a 235mb file to my new pastebin and the memory usage didn't increase at all.

Next the Procfile:

web: BEPASTY_CONFIG=/app/bepasty.conf gunicorn bepasty.wsgi --name bepasty --workers 2 -b 0.0.0.0:8000 -k gevent

I use gunicorn to run bepasty here. Mostly because I know it, but there are a lot of alternatives, i.e. uvicorn, uwsgi or hypercorn.

And finally the requirements.txt:

bepasty[magic]
gevent
gunicorn

Obviously bepasty with the magic file recognition feature. And gunicorn with gevent to run the bepasty server.

For the future I hope running fly deploy every other month should be enough to get the newest bepasty and Python combination.