Homeassistant Weather in Statusbar

I am using Sway as windowmanager with waybar as statusbar. In this statusbar I use wttr.in to show the current weather by calling curl "https://wttr.in/Stuttgart+Germany?format=2". Since a few months this is a bit unrealiable, so I wanted to use Homeassistant as datasource. Both wttr.in and the most used weather plugin in Homeassistant use met.no as datasource.

The weather in my statusbar looks like this with wttr.in:

img1

I want to rebuild the same look with Homeassistant. My version of the Homeassistant template in a curl call looks like this:

curl -s -H "Authorization: Bearer YOUR_LONG_LIVED_TOKEN" \
-H "Content-Type: application/json" \
-d '{"template": "{% set w=states.weather.forecast_home.attributes %}{{ {\"clear-night\": \"✨\", \"cloudy\": \"☁️\", \"exceptional\": \"✨\", \"fog\": \"🌫\", \"hail\": \"🌨\", \"lightning\": \"🌩\", \"lightning-rainy\": \"⛈\", \"partlycloudy\": \"⛅️\", \"pouring\": \"🌨\", \"rainy\": \"🌧\", \"snowy\": \"❄️\", \"snowy-rainy\": \"🌨\", \"sunny\": \"☀️\", \"windy\": \"💨\", \"windy-variant\": \"💨\"}[w.condition] }} 🌡️{{ \"%+d\"|format(w.temperature) }}°C 🌬️{{ [\"↓\", \"↙\", \"←\", \"↖\", \"↑\", \"↗\", \"→\", \"↘\"][int(((w.wind_bearing+22.5)%360)/45.0)] }}{{ w.wind_speed|round }}km/h"}' \
http://localhost:8123/api/template

At the start we set a variable with the current weather and call it w. This reduces the characters needed for the following variable access. The condition emojis are based on constants in the Homeassistant code. The temperature is inserted as number with a manditory sign in front by using the format filter from Jinja2. The wind bearings are a list with 8 values accessed by the degree values from the weather plugin and transformed to values from 0 to 8. The formula is from the wttr.in code.

The result looks like this, which is pretty similar to the wttr.in-version.

img2

I am using the weather data from Homeassistant in different places now (i.e. my kindle status display) and they were pretty reliable in the last weeks.
RaspberryPI Bluetooth Heart Rate Display

While using my rowing machine I want to see my current heart rate and an indication for how long I am already rowing. I record the setup with my Coros watch, so this is only a display. For the last year I used an Android app for this, but at the end of last year this app got a redign and is not working for me anymore. I tried a few other Android apps, but either it needs an account, wants to record something or is not able to only show the heart rate. So I decided I have to build something myself.

I tried to show the heart rate of a Wahoo Tickr chest strap with a Raspberry PI. First using a Raspberry PI Zero W because I have one readily installed lying around, but the Zero loses connection to the chest strap after a few seconds and reconnects. Maybe I have a broken Zero W, which I didn't investigate, or the Zero W is not good enough. I used a Raspberry PI Zero 2 from that time on. Bluetooth is enabled by default with current Raspberry PI OS, so let us first use the tools that are there.

How to get the raw values of a BLE chest strap:

$ hciconfig
hci0:   Type: Primary  Bus: UART
        BD Address: B8:27:EB:06:F6:D9  ACL MTU: 1021:8  SCO MTU: 64:1
        UP RUNNING
        RX bytes:3610 acl:0 sco:0 events:256 errors:0
        TX bytes:33188 acl:0 sco:0 commands:256 errors:0
$ sudo hcitool lescan
EB:D4:07:40:52:A0 TICKR 3AB9
// others removed

// this is maybe not needed, I didn't debug further
$ sudo btmgmt le on

$ sudo bluetoothctl
// from here on we are in bluetoothctl shell
Agent registered
[CHG] Controller E4:5F:01:54:28:34 Pairable: yes
[bluetooth]# scan on
Discovery started
[CHG] Controller E4:5F:01:54:28:34 Discovering: yes
[...]
[bluetooth]# connect EB:D4:07:40:52:A0
Connection successful
[TICKR 3AB9]# gatt.select-attribute 00002a37-0000-1000-8000-00805f9b34fb
[TICKR 3AB9:/service0025/char0026]# gatt.read
Attempting to read /org/bluez/hci0/dev_EB_D4_07_40_52_A0/service0025/char0026
[TICKR 3AB9:/service0025/char0026]# gatt.notify on
[CHG] Attribute /org/bluez/hci0/dev_EB_D4_07_40_52_A0/service0025/char0026 Value:
  16 57 b8 02 bc 02                                .W....
[CHG] Attribute /org/bluez/hci0/dev_EB_D4_07_40_52_A0/service0025/char0026 Value:
  16 57 bc 02                                      .W..

The address of my Tickr is EB:D4:07:40:52:A0. The attribute 00002a37-0000-1000-8000-00805f9b34fb is the service id for the heart rate values. The lines at the end are the raw data from the chest strap. So the connection works and the values only need to be decoded.

The second thing that needs to work is a display connected with I2C. I used a 0.96" Inch I2c IIC Serial 128x64 Oled LCD LED White Display Module which I bought years ago. I2C needs to be activated via raspi-config.

The full Python code and install instructions: https://github.com/mfa/hr-ble-display

Some comments on the code:

The bluetooth part is async, but the I2C display is not. This is not optimal, because the update of the display pauses the async loop. A solution could be to update the display in a thread and send an event to update the display to this thread. For now the current solution is good enough until I actually have an issue while I am using it.

Another thing is the start of the script. I use systemd here with Restart=always because the bluetooth stack needs a bit to initialize and the chest strap some time to be found. This can take a bit, so I boot the Raspberry PI a few minutes before workout (and I may keep it running in the future and add other sensors to the PI).

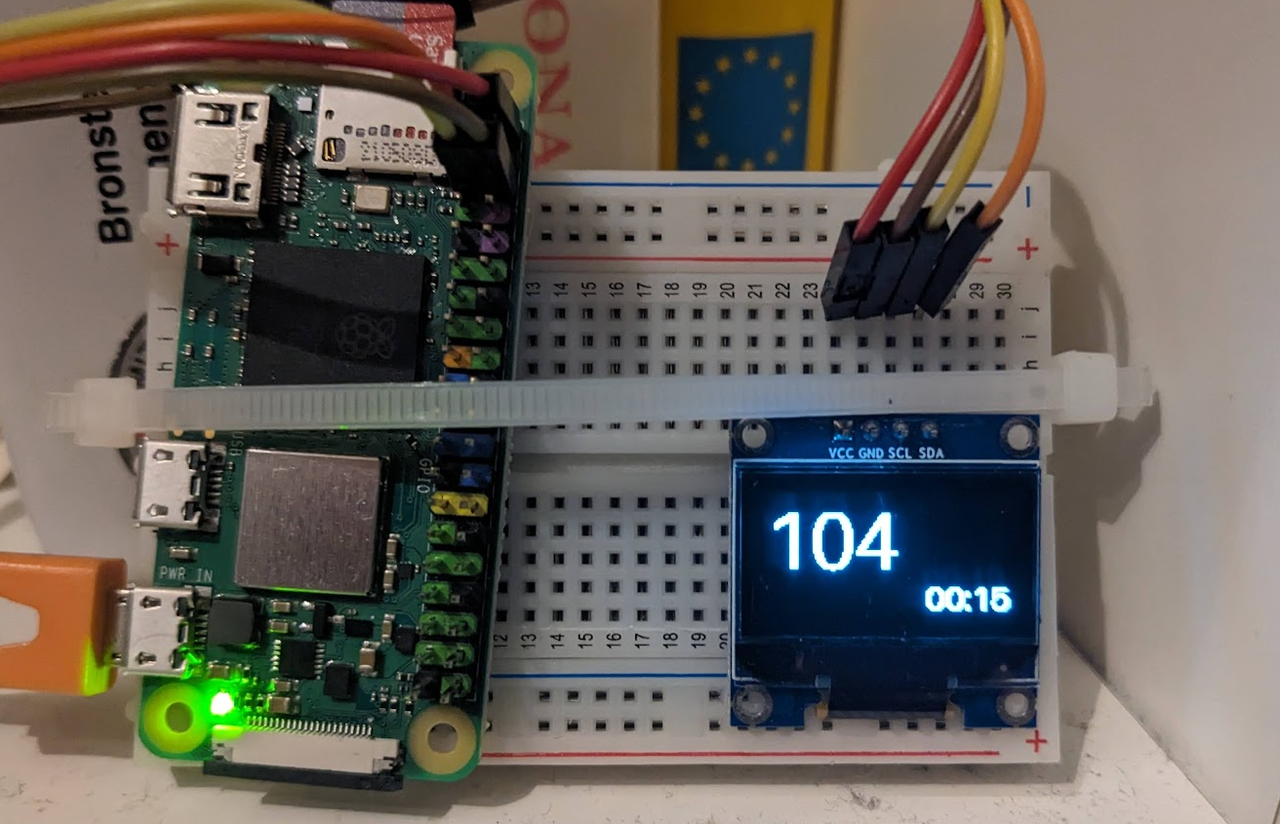
On the display the BPM are shown in a bigger font size and the time since since the workout started in a smaller font in the lower right corner. The workout time is since the start or since the BPM was 0 the last time.

The whole setup in action:

img1

Homeassistant Certification Check and Notification

I want to monitor certificates of my websites. They should automatically update with acme.sh but this occasionally breaks. To monitor certificates in Homeassistant there is an integration: Certificate Expiry. This is very easy to setup by adding a domain and a port per entry. The information logged is the domain expiration date.

The next step is to notify me when the certificate is actually nearly expired. First we need a way to notify -- I chose pushover, but there are a lot of other ways (filter by notifications). Pushover needs an app -- this app can with a link in the pushover integrations docs. Then add the API key of the app and the user key to the Homeassistant integration. I installed the Android app on my phone and tested the push via the pushover site by selecting the Homeassistant app profile.

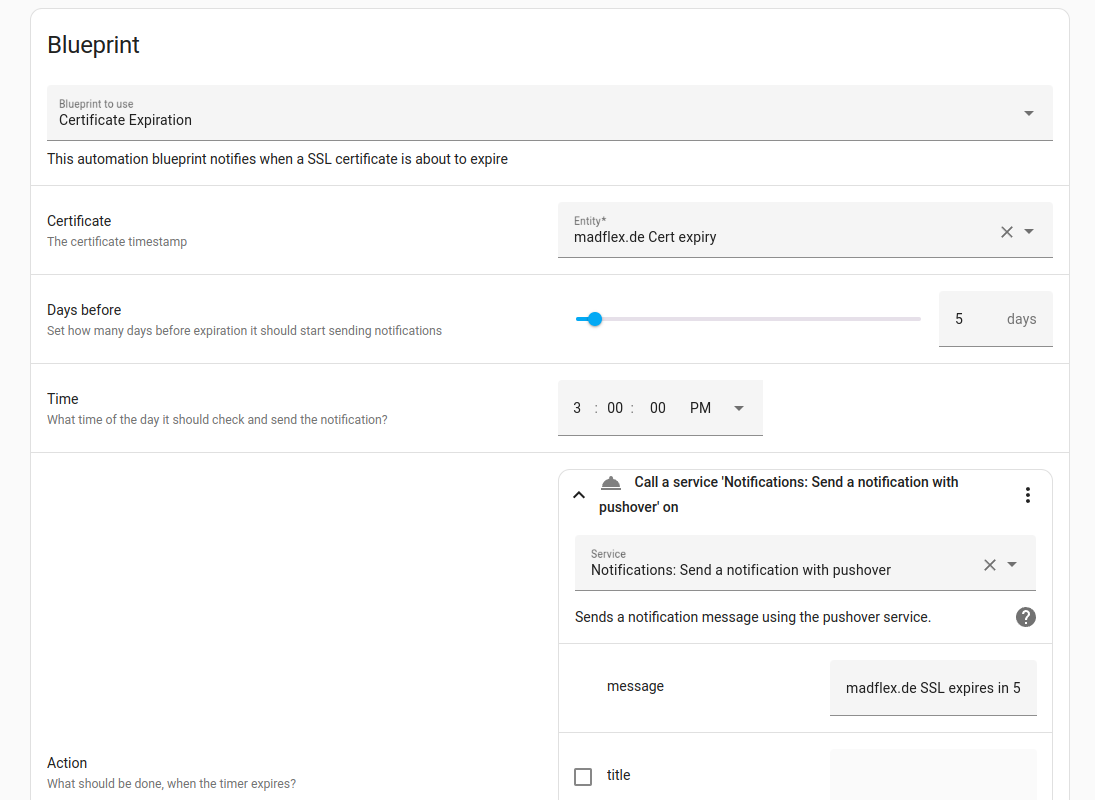
Now we need automations to trigger the notifications. I used a blueprint from an Homeassistant forum post that provides a blueprint to not only select the certificate but the days before expiry and the type of action. The blueprint is saved in the homeassistant folder, i.e. .homeassistant/blueprints/automation/custom/certification-expiration.yaml.

Here is a screenshot of an automation generated based on the blueprint by clicking on new automation and selecting the blueprint:

img1

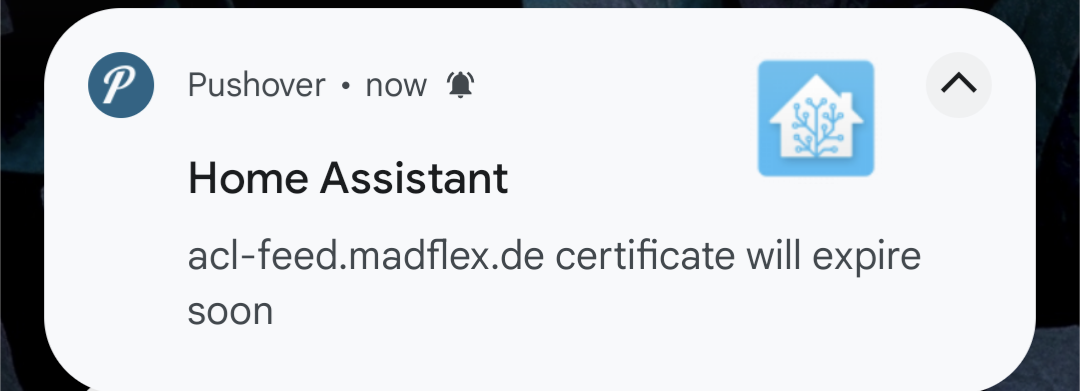
To test the feature I selected a certificate that will expire in next 40 days (most of them will trigger) and selected a time to trigger in the next minutes. The message looks like this on my Android phone:

img2

So the whole setup works. I created automations for my most valuable domains and hope I will never get a push notification. :)