Raspberry PI Heatsinks

In the last days I added heatsinks to a Raspberry PI Zero 2W and to a Raspberry PI 4.

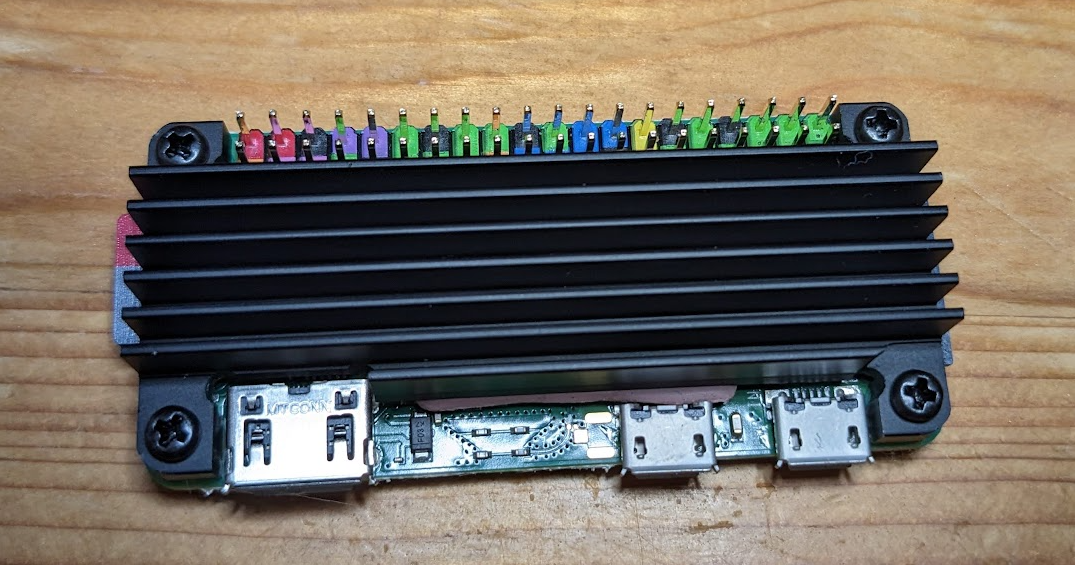
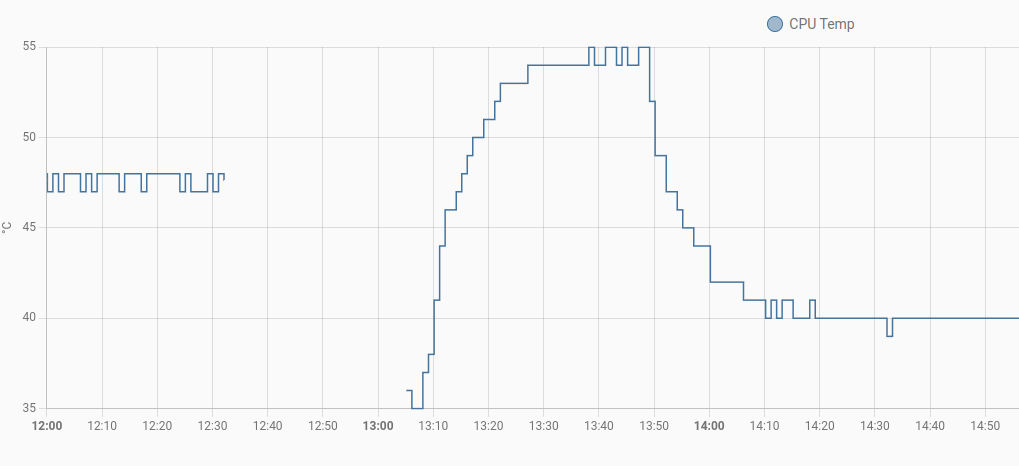
The Raspbery PI Zero 2 is running 24/7 doing some compute in a room where it should not have a fan. So I added a cheap Heatsink (C296) and looked at the temperature measurements in Homeassistant for this PI.

Setup:

img1

Temperature Graph:

img2

On the left side is the temperature without heatsink. Then I added the heatsink and ran some compute intense code on the PI. The following baseline is better than without heatsink.


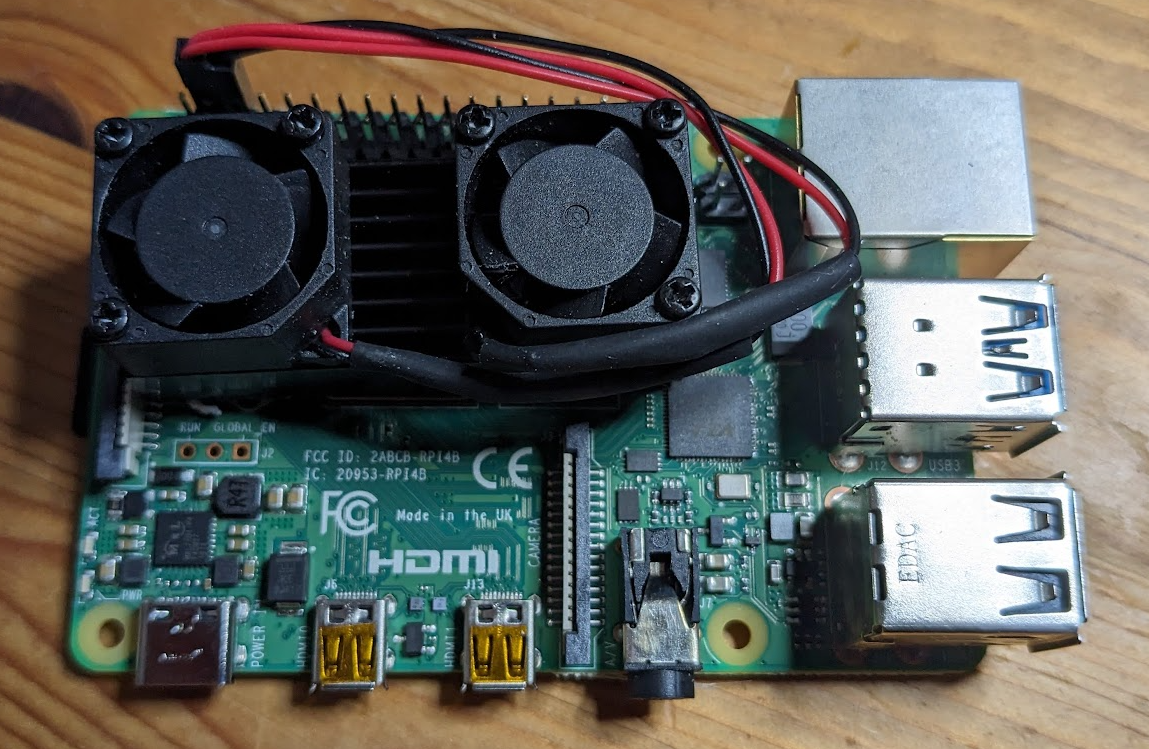
The other Raspberry PI that got a new heatsink is a PI 4. I only used this PI for short experiments, because the fan is way too loud.

The setup before:

img3

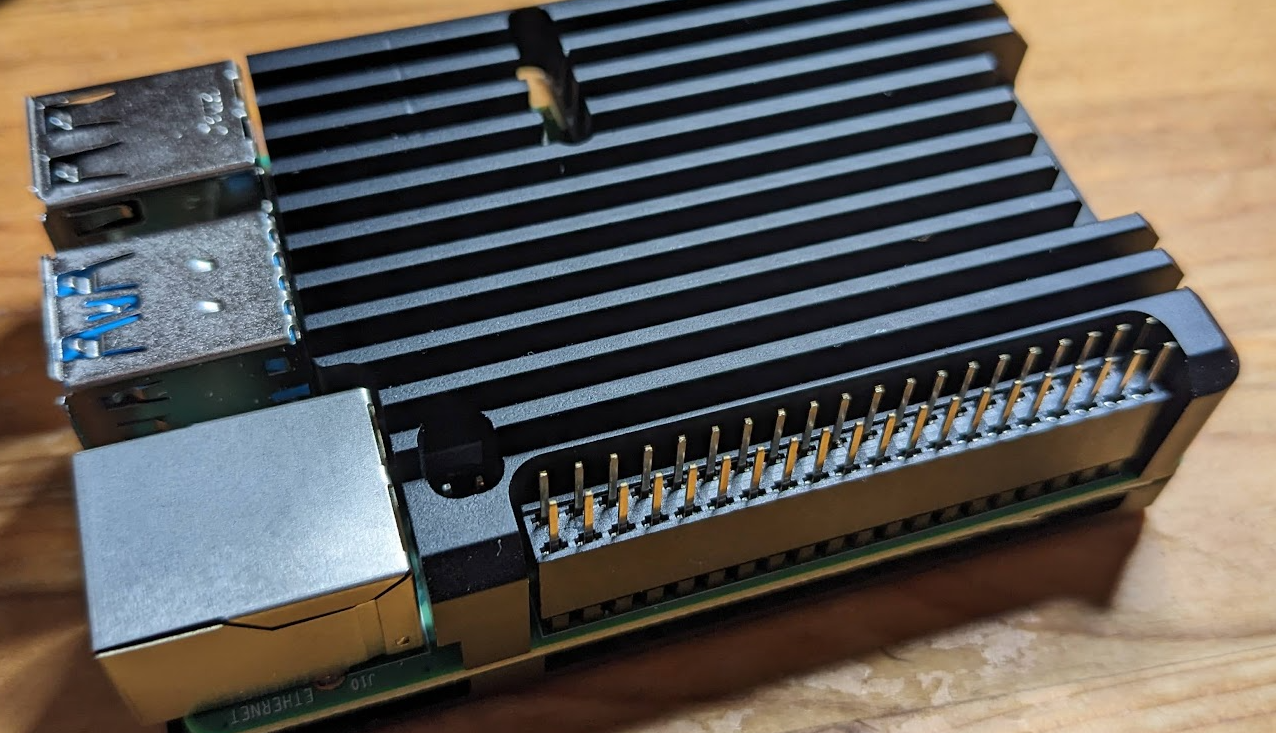
Setup with heatsink (P122):

img4

For the next PI4 (or PI5) I would probably choose a P165 heatsink, because the bottom part is not very useful and adding a shield (i.e. for an ssd: X862) below sounds like a nice option.

Seeed XIAO BLE nRF52840 with Micropython

I bought a Seeed XIAO BLE nRF52840 because the bluetooth part seems to be supported in Rust and Micropython, which is not the case for the Raspberry PI Pico yet. First I tried to bring some Rust code on the XIAO nRF but I failed. So MicroPython it is for now.

First step will be to get the LEDs on the board to blink. Then a bit of Bluetooth exploration and finally connecting an OLED display.

Flashing Micropython on the XIAO nRF is the same as for any other Micropython supported microcontroller. I used the already build version from https://micropython.org/download/SEEED_XIAO_NRF52/. To flash on the microcontroller press the button while connecting to your PC and a filesystem will be shown. Copy the .uf there and the device will reboot with the Micropython firmware. The button is very small, so this part is a bit tricky.

I used rshell to get REPL on the XIAO nRF by typing repl as command when running rshell.

There are 2 LEDs on the board. A green system LED, numer 1 in Micropython, and a 3-in-one LED, numbered 2 to 4 in Micropython. The color numbers are 2 (red), 3 (green) and 4 (blue).

Use the LEDs:

from board import LED
LED(1).on()
LED(2).on()
LED(3).on()
LED(4).on()
# and to turn them off
LED(1).off()
LED(2).off()
LED(3).off()
LED(4).off()

LED 4 (blue) activated, all others off:
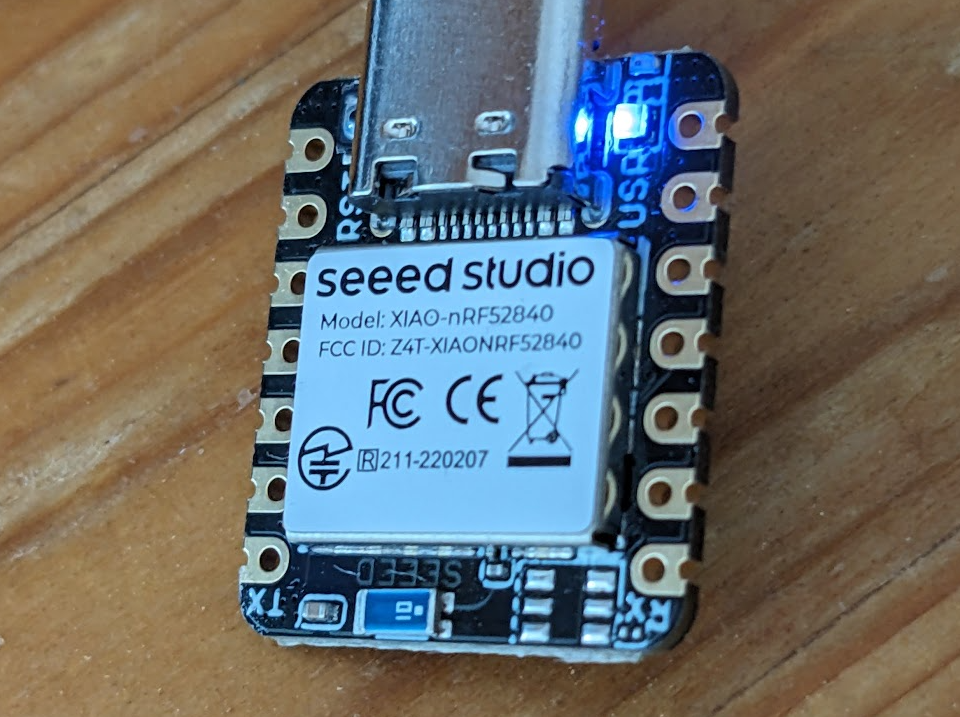
img1

Next some Bluetooth exploration. In the Micropython repository is an example how to scan for Bluetooth devices. I couldn't find any documentation for the library used here, only the C code.

Scan for bluetooth devices:

import time
from ubluepy import Scanner, constants
for _ in range(10):
    s = Scanner()
    scan_res = s.scan(100)
    for node in [i.getScanData() for i in scan_res if i]:
        for entry in node:
            if entry[0] == constants.ad_types.AD_TYPE_COMPLETE_LOCAL_NAME:
                print(f"{entry[1]}:", entry[2])
    time.sleep_ms(100)

When wearing a Wahoo TICKR heartrate sensor this returns (together with some other devices):

AD_TYPE_COMPLETE_LOCAL_NAME: bytearray(b'TICKR 3AB9')

And finally the OLED display. Before I could connect a display I had to solder pins on the XIAO.

For the display we need a Python module. As in a previous post we will use the one from Micropython Github and copy it to the XIAO with cp ssd1306.py /flash. This is a different path that for the Pico!

The Pins of the XIAO nRF are shown in the wiki from seeedstudio about the device. The display I am using needs 3.3V, so I use the 3.3V pin.

The Python code to show a text on the display:

from machine import Pin, I2C
import ssd1306
i2c = I2C(0, sda=Pin.board.D4_A4, scl=Pin.board.D5_A5)
display = ssd1306.SSD1306_I2C(128, 32, i2c)
# clear display
display.fill(0)
# show a simple text
display.text('Hello World!', 0, 0, 1)
display.show()
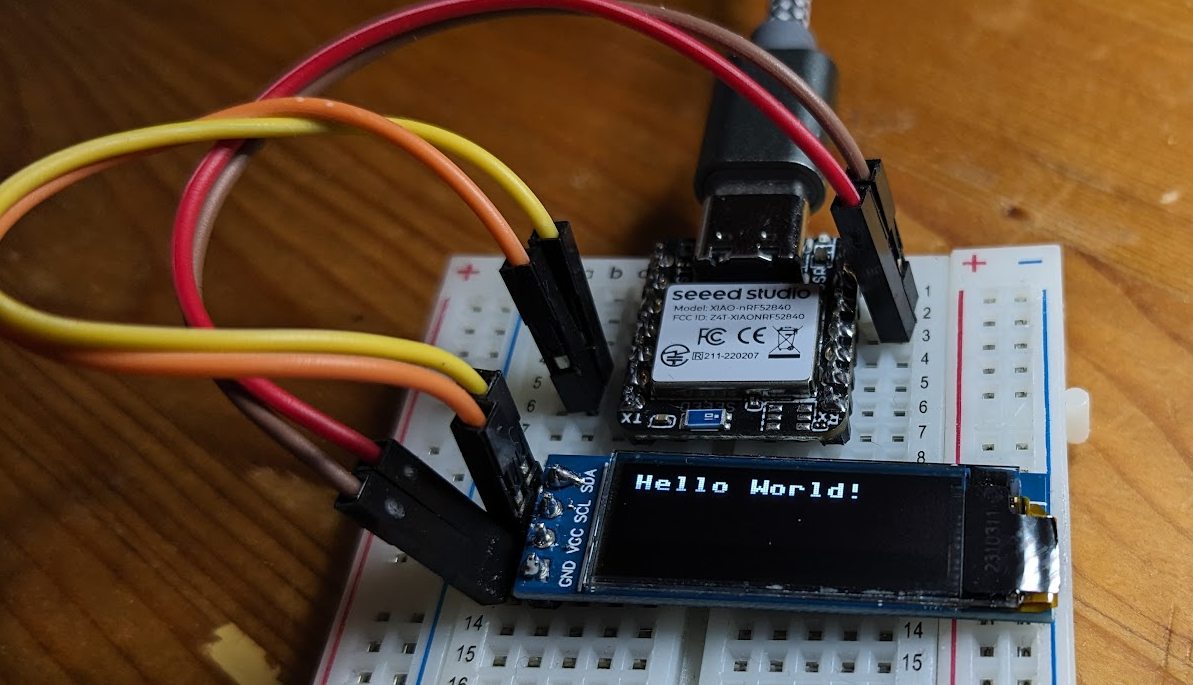
img2

Overall the nRF part in Micropython looks solid, but is not well documented. I still plan on porting my Heartrate monitor display from Raspberry PI Zero to this Microcontroller for faster bootup time.
Python Save File in a Thread

A friend asked me how to run compute while it is saving data to a file in the background on a Raspberry PI. The whole program will not be async, so the simplest way is to use old school threading.

The first version will use the threading Python module. The data is an image downloaded from picsum.photos but saved in a thread without blocking. Some logging is added to show execution order and timings.

import logging
import threading
import time
from pathlib import Path

import requests

logger = logging.getLogger(__name__)

def get_random_image():
    r = requests.get("https://picsum.photos/1000/1000")
    return r.content

def save_data(name, data):
    logger.info("start save")
    with Path(name).open("wb") as fp:
        fp.write(data)
    logger.info("end save")

def main():
    logging.basicConfig(level=logging.INFO, format="%(asctime)s %(message)s")
    x = threading.Thread(target=save_data, args=("image.jpg", get_random_image()))
    x.start()
    logger.info("start compute")
    # add some real compute here instead
    time.sleep(1)
    logger.info("end compute")
    # actually not needed; the program will wait until the thread finishes
    x.join()

if __name__ == "__main__":
    main()

When run this is printed:

2024-04-16 22:19:10,489 start save
2024-04-16 22:19:10,489 start compute
2024-04-16 22:19:10,490 end save
2024-04-16 22:19:11,490 end compute

Compute ends last, because the sleep of 1 second is actually slower than saving a file to an SSD on my notebook.

The second version is using ThreadPoolExecutor from the concurrent.futures module. The ThreadPoolExecutor will execute code in a pool of threads the same as the previous example but with a newer API.

The same example as before, but using concurrent.futures.ThreadPoolExecutor:

import logging
import time
from concurrent.futures import ThreadPoolExecutor
from pathlib import Path

import requests

logger = logging.getLogger(__name__)

def get_random_image():
    r = requests.get("https://picsum.photos/1000/1000")
    return r.content

def save_data(name, data):
    logger.info("start save")
    with Path(name).open("wb") as fp:
        fp.write(data)
    logger.info("end save")

def main():
    logging.basicConfig(level=logging.INFO, format="%(asctime)s %(message)s")
    # start 1 threadpool executor
    x = ThreadPoolExecutor(1)
    x.submit(save_data, "image.jpg", get_random_image())
    logger.info("start compute")
    # add some real compute here instead
    time.sleep(1)
    logger.info("end compute")
    # remove the executor savely; wait=True is the default
    x.shutdown()

if __name__ == "__main__":
    main()

Running this code returned for me:

2024-04-16 22:38:25,391 start save
2024-04-16 22:38:25,391 start compute
2024-04-16 22:38:25,392 end save
2024-04-16 22:38:26,392 end compute

The final option is to replace ThreadPoolExecutor with ProcessPoolExecutor. The API works the same, but the ProcessPoolExecutor is using the multiprocessing module which will start extra processes. Using extra processes helps with the Global Interpreter Lock, but all data moved between them has to be serializable. For us this is a binary stream of content (the image) and a filename, so no issue here. But more complex data structures may need some additional serialization to be moved around.

Using a ProcessPoolExecutor will return nearly the same results as the previous versions:

2024-04-16 22:44:24,757 start compute
2024-04-16 22:44:24,759 start save
2024-04-16 22:44:24,759 end save
2024-04-16 22:44:25,757 end compute

I would probably use the ThreadPoolExecutor while developing my program and replace it later with ProcessPoolExecutor if it is actually faster without breaking anything.