Selfhost OverPass API

I don't know how many Overpass Api requests I will need for my current hobby project idea. So I decided to try selfhosting Overpass.

There is a ready to use AWS AMI with the planet inside. But I don't want to use AWS for private projects so I will try to run this on a Hetzner VPS instance. The server I used was a CX32 with 4 cores, 8 GB memory and 80GB disk. As operating system I used Debian 12, but any Linux should work here.

The 8GB of memory are not enough so we create a swapfile with additonal 8GB of memory:

fallocate -l 8G /swapfile
chmod 600 /swapfile
mkswap /swapfile
swapon /swapfile
swapon --show

Then I installed Docker Engine.

I converted the Docker command from the Overpass API readme into a Docker Compose file. Here I replaced Monaco with Baden-Württemberg and used the more current pbf version and not the .osm.bz2 one. The initial processing for converting the 4GB pbf into bz2 takes a while, but this should be faster than processing the minutes for 200 days (If that is even possible/happening). Also the whole importing and updating before the first start takes quite a bit of time and this is also the memory consuming part.

The docker-compose.yml I used:

---
services:
  overpass:
    image: wiktorn/overpass-api
    container_name: overpass
    environment:
      OVERPASS_META: no
      OVERPASS_MODE: init
      OVERPASS_PLANET_URL: https://download.geofabrik.de/europe/germany/baden-wuerttemberg-latest.osm.pbf
      OVERPASS_DIFF_URL: https://download.geofabrik.de/europe/germany/baden-wuerttemberg-updates/
      OVERPASS_RULES_LOAD: 10
      OVERPASS_COMPRESSION: gz
      OVERPASS_UPDATE_SLEEP: 3600
      OVERPASS_PLANET_PREPROCESS: 'mv /db/planet.osm.bz2 /db/planet.osm.pbf && osmium cat -o /db/planet.osm.bz2 /db/planet.osm.pbf && rm /db/planet.osm.pbf'
    volumes:
      - ./overpass_db/:/db
    ports:
      - "80:80"

And then run with docker compose up. This will take quite some time and may swap a bit, depending on the size of your planet file and the minutes. When the processing is done, the container will exit and when you restart it again the same way it will be live and happy to serve.

Now the API is running and we use the same query as in my overpass post from last year. Only this time we use our own overpass instance.

import json
# pip install OSMPythonTools
from OSMPythonTools import overpass

ip = "IP_ADDRESS_OF_YOUR_SERVER"
api = overpass.Overpass(endpoint=f"http://{ip}/api/")
# bbox for Stuttgart Mitte (roughly)
bbox_coords = [48.76605, 9.1657, 48.78508, 9.18995]
query = overpass.overpassQueryBuilder(
    bbox=bbox_coords,
    elementType=["node", "way"],
    # all restaurants that have a positive diet:vegan tag
    selector=['"amenity"="restaurant"', '"diet:vegan"~"yes|only"'],
    out="body",
)
result = api.query(query, timeout=60)

for index, item in enumerate(result.toJSON()["elements"]):
    print(index, item["tags"])

Last time 14 vegan restaurants were found in Stuttgart Mitte. This increased by one to 15 restaurants.
Micropython and Bluetooth on the nRF chip

A few months ago I bought a Seeed XIAO BLE nRF52840 because of the bluetooth features. I did a first exploration of this chip with Micropython. My plan was to replace the Raspberry Pi Pico Heartrate display I build a while ago.

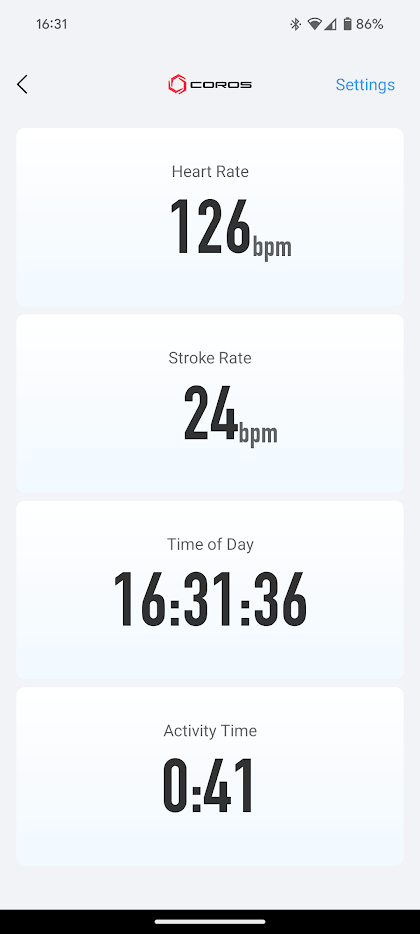
Meanwhile my Watch got an Update that solved this issue for me completly. Coros added the possibility to mirror the watch in the Android App. This even shows the (estimated) stroke rate.

img1

Before knowing about this I fiddled with the ubluepy code in Micropython. I didn't figure out how to read the heartrate values.

The nRF chip doesn't have the "normal" bluetooth module and therefore aioble doesn't work. Most of the examples out there use aioble though. Micropython plans to merge all the bluetooth code , so maybe in the future there is a working solution.

This is how far I got:

import time
from ubluepy import Scanner, constants, Peripheral
def get_node():
    for _ in range(10):
        s = Scanner()
        for node in s.scan(500):
            scan = node.getScanData()
            if scan:
                for entry in scan:
                    # find the sensor that starts with TICKR
                    if entry[0] == constants.ad_types.AD_TYPE_COMPLETE_LOCAL_NAME and entry[2].startswith("TICKR"):
                        print(f"NODE found:", entry[2])
                        return node
        time.sleep_ms(100)

# get device
dev = get_node()
print(dev.addr())
# returns: eb:d4:07:40:52:a0 -- the address I used in my Raspberry PI code -- good until here
p = Peripheral()
# and this here hangs forever
p.connect(dev.addr())

So the connect doesn't work and I don't know what to change, or if this even should work. Seems for me that this is not fully implemented in the ubluepy stack for the nRF chip. The examples in the Micropython github are mostly for advertising sensors and none for actually reading values from a (BLE) sensor.

Push to Redis via VPN

In the previous blog post I described how I run a Redis on a Raspberry Pi Zero 1W in my local network. Now I want to push messages from the Internet to this Redis.

For simplicity I will use Flask on Fly.io and the Flask code will be very similar to the one that saves to S3 I posted a few weeks ago. The Flask service on Fly.io is connected via Wireguard to the Pi Zero in my local network.

As first step we need to connect the app to my local Redis. I followed the instructions in the fly.io docs on bridge-deployments. The blueprint shows howto create a wireguard config on your notebook and then run this config on the system you want to connect to the Fly.io instances.

My walkthrough:

# this assumes the app is already launched and deployed!
# create the wireguard configuration
fly wireguard create personal ams zero5 fly0.conf
# copy to my Pi Zero
scp fly0.conf pi@zero5.local:.
# login there via ssh
ssh pi@zero5.local
# install wireguard
sudo apt -y install wireguard
# copy the conf to the correct place
sudo cp fly0.conf /etc/wireguard/fly0.conf
# and start the vpn
sudo systemctl enable --now wg-quick@fly0.service
# ping the app we connected to
ping _api.internal
# leave the Pi Zero
logout

# optional: verify from the other side
fly ssh console
# first we need ping
apt install -y iputils-ping
# now ping the Pi Zero
ping zero5._peer.internal
# leave the fly machine
logout

The Code for the Flask app using RQ as message queue.

import json
import os

from flask import Flask, request
from redis import Redis
from rq import Connection, Queue
from werkzeug.middleware.proxy_fix import ProxyFix

from .utils import check_signature

app = Flask(__name__)
app.wsgi_app = ProxyFix(app.wsgi_app)

def job(dataset, uid=None):
    _host = os.environ.get("REDIS_HOST")
    _password = os.environ.get("REDIS_PASSWORD")
    with Connection(Redis(_host, 6379, password=_password)):
        # keep jobs for 24h
        q = Queue("default", default_timeout=3600 * 24)
        q.enqueue(
            "work.process_webhook",
            kwargs={
                "_meta": {"uid": uid if uid else dataset.get("uid")},
                "_data": dataset,
            },
            result_ttl=0,  # no return value
        )

@app.route("/", methods=["GET", "POST"])
async def index():
    if request.method == "GET":
        return "nothing to see here"
    else:
        uid = request.args.get("uid")
        data = request.data
        signature = request.headers.get("X-MYAX-SIGNATURE")
        secret = os.environ.get("AX_WEBHOOK_SECRET")
        if check_signature(signature, data, secret):
            print("signature valid", flush=True)
            dataset = json.loads(data)
            if "id" in dataset:
                dataset["document_id"] = dataset.pop("id")
            job(dataset, uid)

    return "OK"

The request is received and send as a message into the queue with as little code as needed. For Redis two secrets need to be set via flyctl: REDIS_HOST and REDIS_PASSWORD. For my example the REDIS_HOST is zero5._peer.internal. Additionally the AX_WEBHOOK_SECRET similar to the S3 version to verify the hmac signature. The check_signature part is the one from the S3 version too.

The worker side in my local network is processing the jobs from the Redis queue. For this demo the job will write the message to disk.

We enqueued the job with the name work.process_webhook, so we need a work.py with a function process_webhook. For example:

import json

def process_webhook(**kwargs):
    json.dump(kwargs["_data"], open(kwargs["_meta"]["uid"] + ".json", "w"))

This saves everything in _data into a json file. To run the worker that fetches the jobs and runs the process_webhook we call it like this:

rq worker default --url redis://:REDIS_PASSWORD@REDIS_HOST/

The work.py has to be in the same folder. I used the same Redis password here, but as Redis host the ip-address in my local network. The : before the password is important. This marks the empty username in the url.

In my tests a message takes a few seconds, but I didn't loose any job yet. The 24h until a message is dropped should be enough for everything I plan here.